The weather in Australia is notoriously unpredictable. One minute you have clear blue skies, and the next, a southerly buster or a tropical low is tearing through your property. For homeowners and farmers, a backyard shed is a significant investment. It houses expensive tools, machinery, and vehicles. Yet, too often, the importance of securing that structure is overlooked until the wind starts howling.
Proper shed anchoring is not just about keeping the structure standing; it is a critical safety issue. In high-wind events, a poorly secured shed can detach from the ground. Once airborne, it becomes a massive, dangerous projectile that can destroy homes and endanger lives. This guide explores why anchoring is vital in the Australian climate and provides actionable steps to secure your assets.
Why Shed Anchoring Matters in Australia
Australia’s vast landscape covers a wide range of climate zones, many of which are prone to extreme wind events. From the cyclone belts of Queensland and the Northern Territory to the gale-force coastal winds of Victoria and Western Australia, no region is entirely immune to the power of the wind.
When wind hits a building, it doesn’t just push against the side (lateral force). It also travels over the roof, creating a suction effect known as “uplift.” If the connection between the shed and the ground is weaker than this uplift force, the entire structure can be ripped from its foundations.
To combat this, you must understand the specific requirements for your location. This brings us to the crucial concept of the shed wind rating Australia standards. These ratings ensure that your shed is engineered to withstand the specific wind speeds historically recorded in your area.
Understanding Shed Wind Ratings in Australia
Before you drive a single bolt into the ground, you need to know your wind region. The Australian Standards (AS/NZS 1170.2) classify the continent into four distinct wind regions based on wind speed and cyclone frequency.
- Region A: Most inland areas and southern coastal regions. These are considered “normal” wind conditions, but storms can still be severe.
- Region B: Typically covers a band around the coast (excluding cyclone areas). Winds here are stronger due to the lack of friction from the ocean.
- Region C: Cyclonic areas. This covers much of the tropical coast north of Bundaberg in Queensland, extending to parts of Western Australia.
- Region D: Severe cyclonic areas. This creates the highest risk, primarily located on the rigorous northwest coast of Western Australia (like Port Hedland).
Complying with these standards is mandatory. A shed designed for Region A will almost certainly fail if built in Region C. The wind rating dictates everything about the shed’s design, including the thickness of the steel, the spacing of the bracing, and, most importantly, the type and depth of the anchoring system.
How to Anchor a Shed Properly
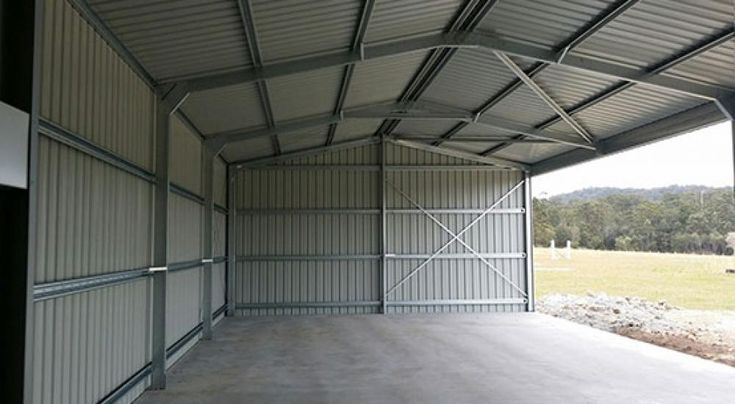
The method you choose to secure your structure depends largely on what lies beneath it. You are generally anchoring into one of two foundations: a concrete slab or directly into the soil. Here is how to anchor a shed effectively in both scenarios.
Anchoring to a Concrete Slab
For most permanent residential sheds, a concrete slab is the preferred foundation.
- Anchor Bolts (Dynabolts): These are the industry standard for securing steel plates to cured concrete. As you tighten the nut, a sleeve expands inside the drilled hole, gripping the concrete.
- Chemical Anchors: For higher load requirements or older concrete, chemical anchors are superior. A resin is injected into the hole before inserting a threaded stud. The chemical bond is incredibly strong and seals the hole against moisture.
- Edge Distance Considerations: A critical mistake is drilling too close to the edge of the slab. If the anchor is too close, the pressure can crack the concrete, rendering the anchor useless. Always follow the manufacturer’s guide for minimum edge distances.
Anchoring to Ground or Soil
If you are placing a shed on a farm or a temporary site without a slab, you need earth-specific solutions.
- Concrete Footings: This involves digging holes at the column locations (piers), placing the column or a bracket inside, and filling it with concrete. This provides excellent resistance against uplift.
- Auger-Style Anchors: These act like giant screws turned into the earth. They rely on the soil’s weight and friction to hold the shed down. They are effective in firm soil but can be risky in loose sand.
- Ground Anchors: These are often driven into the ground with a sledgehammer and feature flukes that rotate to “lock” into the soil when pulled upward.
Anchoring in Cyclone-Prone Areas
In Regions C and D, standard anchors will not suffice. You need engineered solutions designed for extreme stress.
- Reinforced Footings: Concrete piers must be significantly deeper and wider to create enough “ballast” weight to counteract massive uplift forces.
- Heavy-Duty Brackets: The brackets connecting the column to the footing are often thicker and require high-tensile bolts.
- Tie-Down Systems: Some designs utilize steel cables or straps that run over the frame and anchor directly into deep concrete footings, physically holding the roof down.
Creating a Cyclone Proof Shed
Building a truly cyclone proof shed requires looking beyond just the footings. The anchors hold the structure to the ground, but the structure itself must stay intact.
If the walls collapse, the roof will likely follow. To prevent this, structural reinforcements are necessary. This includes additional wall and roof bracing (often cross-bracing) to prevent the frame from twisting (racking) under pressure.
Fasteners are another weak point. In cyclone areas, you cannot use standard screws. You must use designated cyclone assemblies, which often include larger washers (cyclone plates) that spread the load. This prevents the metal cladding from tearing through the screw heads when the wind pressure drops suddenly.
Finally, consider the roof design. A lower roof pitch generally offers less resistance to the wind than a steep pitch. Furthermore, regular inspections of the cladding are vital; a loose sheet can let wind inside the shed, effectively blowing it apart from the inside out.
Common Shed Anchoring Mistakes to Avoid
Even the best hardware fails if installed incorrectly. Avoid these frequent errors:
- Using Undersized Anchors: Never guess the size of the bolt. If the engineering plans specify a 12mm bolt, a 10mm bolt is unsafe.
- Ignoring Soil Conditions: Installing ground anchors into soft, sandy, or wet soil provides very little holding power. In these cases, concrete piers are usually required.
- Not Following Engineering Specifications: Your shed comes with an engineering document for a reason. Ignoring the spacing or depth requirements is a recipe for disaster.
- DIY Shortcuts: Skipping a bracket because it’s “hard to reach” or using fewer screws than recommended significantly compromises the structural integrity.
Maintenance & Inspection Checklist
Your shed is exposed to the elements 24/7. Over time, vibration and corrosion can weaken your anchoring system.
- Post-Storm Inspection: After any major wind event, walk around the shed. Look for signs of movement at the base plates.
- Tightening Bolts: Nuts can loosen over time due to thermal expansion and contraction. Check them annually with a wrench.
- Check for Corrosion: If you are near the coast, salt air attacks steel. If anchor bolts look rusty, they may have lost their tensile strength and need replacing.
- Inspect Concrete: Look for cracks radiating from the anchor points. This indicates the bolt is under stress or the concrete is failing.
Conclusion
Securing your shed is about protecting your investment and your community. A shed that fails during a storm causes damage that far exceeds the cost of proper anchoring. By understanding your local wind region and strictly following Australian Standards, you ensure your structure stays put when the weather turns wild.
Don’t leave it to chance. If you are unsure about the requirements for your area or the soil conditions on your property, consult a local shed professional or a structural engineer. Getting the right advice now prevents heartbreak later.