
Shed installation on concrete requires a correctly prepared slab, appropriate reinforcement for the loads and site conditions, and secure anchoring to meet Australian Building Standards. The right slab specification depends on your shed size, intended use, soil type, wind region, and local council requirements — there is no single slab design that suits every situation.
Getting a shed onto a concrete base sounds straightforward. In practice, it involves a sequence of decisions that each affect the long-term performance of the structure. The wrong slab thickness, poor drainage planning, or inadequate anchoring can compromise a shed that would otherwise stand for decades.
This guide is written for Australian homeowners, rural property owners, and backyard builders who are planning a new shed installation on a concrete slab — whether that means pouring fresh concrete, assessing an existing slab, or coordinating a complete site build. It covers what a concrete shed foundation needs to include, how to anchor a steel shed correctly, what council approvals may apply, and where professional engineering advice becomes necessary rather than optional.
The conditions that affect a shed foundation in Australia — reactive soils, cyclonic wind regions, bushfire-prone areas, coastal environments, and heavy seasonal rainfall — vary significantly from site to site. Always confirm the slab, anchoring, and engineering requirements for your specific shed before construction or installation.
Shed Installation on Concrete — Is a Concrete Slab a Good Base?
Yes, a concrete slab is the most widely used and durable foundation for shed installation in Australia. It provides a stable, level surface that resists shifting in reactive soils, prevents moisture from rising through the floor, and allows the shed frame to be anchored securely. For most residential, workshop, farm, and industrial sheds, concrete is the standard choice.
That said, “concrete slab” covers a wide range of specifications. A standard 100mm residential slab with light mesh reinforcement handles very different loads than a 150–200mm reinforced slab designed for heavy farm machinery. The slab must be designed to suit the shed — not selected generically.
For a detailed look at how concrete compares to other flooring options for residential and farm sheds, see our guide on the best shed flooring options.
Preparing the Site Before Installing a Shed on Concrete
Site preparation is where many shed projects encounter their first problems. Rushing through this stage — or skipping steps to save money — tends to produce consequences that are expensive to correct later.
The preparation process generally follows this sequence:
- Mark the shed footprint and check setbacks. Confirm the shed’s planned position meets your local council’s boundary setback requirements before any groundwork begins.
- Clear the area completely. Remove vegetation, topsoil, tree roots, and any debris within and around the slab area. Organic material beneath a slab can cause uneven settling over time.
- Assess soil type. Reactive clay soils expand when wet and shrink when dry. This movement can crack a slab that is not adequately designed for those conditions. If you are on a reactive soil type, engineering input at the slab design stage is especially important.
- Grade for drainage. The site must be shaped so that water drains away from the shed footprint. Poor drainage is one of the most common causes of slab erosion and long-term moisture problems.
- Compact the sub-base. The ground beneath the slab must be mechanically compacted to a consistent level. Skipping compaction leads to slab settlement and cracking under load.
- Install formwork to the correct dimensions. The formwork defines the perimeter of the slab and must be level and square before concrete is poured.
Drainage deserves particular attention in areas with heavy seasonal rainfall. If your shed site sits at the base of a slope, or in a low-lying area, water management must be addressed before any concrete work begins.
What Should a Concrete Shed Slab Include?
A concrete shed slab typically includes a moisture barrier, steel reinforcement, the concrete pour itself, and edge thickening or footings to support the shed frame. The specific requirements vary with the shed’s intended use, local soil conditions, and the loads the slab must carry.
The core components are:
- Vapour barrier: A plastic membrane is laid over the compacted sub-base before pouring. It prevents ground moisture from rising through the porous concrete and affecting stored goods, tools, and the steel frame above.
- Steel mesh reinforcement: Reinforcement holds the slab together under load and resists cracking. The gauge and spacing of the mesh depends on what the slab will carry — light residential loads require different reinforcement to heavy farm machinery.
- Edge thickening or strip footings: The perimeter of the slab is typically thickened or supported by footings to handle the concentrated loads at the shed’s base plates or anchor points.
- Expansion joints: Concrete expands in heat and contracts in cold. Expansion joints provide planned relief points so the slab cracks where intended — not randomly across the surface.
- Correct concrete grade: The concrete mix must be appropriate for the site conditions. Coastal environments, for example, may require a higher-grade mix to resist the effects of salt air on steel reinforcement embedded in the slab.
Not sure how much slab area you need? The dimensions of your slab follow directly from your shed size. If you are still working out what size structure will suit your site and storage needs, our guide on what size shed do I need walks through the key decisions.
Installing a Shed on an Existing Concrete Slab
Yes, you can install a shed on an existing concrete slab — but the slab must be assessed before installation begins. Not every existing slab will be suitable without modification, and some slabs may present structural issues that affect how the shed can be anchored.
Before installing a shed on an existing slab, check the following:
- Condition: Look for significant cracking, spalling, or uneven surfaces. Hairline cracks are common and may be acceptable; structural cracking or heaving suggests a problem that needs assessment.
- Dimensions: The slab must extend at least to the full footprint of the shed. Ideally, it extends slightly beyond the wall line to provide working clearance.
- Thickness: A slab that was poured for light-duty use — a patio or garden area, for example — may not be thick enough to handle the loads your shed will place on it.
- Level: The slab surface needs to be level within acceptable tolerances for the shed frame to sit correctly.
- Drainage: Check whether water pools on or around the slab. If it does, this needs to be addressed before the shed is installed.
- Existing fixings or penetrations: Check for services (electrical conduit, plumbing, drainage) that may run beneath or through the slab before drilling for anchors.
If the existing slab is structurally sound and correctly dimensioned, installing a shed on a concrete slab of that kind is generally straightforward. If there are doubts, a concretor or structural engineer can assess the slab and advise on whether modification, additional footings, or a new pour is warranted.
How to Anchor a Shed to Concrete
A shed must be anchored to its concrete slab to prevent uplift and racking forces from displacing the structure during high winds. In most Australian wind regions, anchoring is not optional — it is a structural requirement.
The standard anchoring process for a steel shed on concrete involves:
- Mark the anchor positions from the shed’s engineering drawings. The number and placement of anchors are determined by the shed’s design load, not by what happens to be convenient on the day.
- Drill the holes to the correct diameter and depth specified by the engineer or anchor manufacturer. Use a rotary hammer drill with a carbide-tipped bit.
- Clean the holes thoroughly to remove concrete dust and debris. Contaminated holes affect the bond strength of chemically set anchors.
- Install the anchors — typically chemical anchors (epoxy or resin-based) or mechanical expansion anchors, depending on the engineering specification. Chemical anchors are commonly specified for high-wind or cyclonic regions.
- Allow cure time for chemical anchors before applying load. Do not rush this step.
- Install the shed base plates over the anchors and torque the bolts to the specified value.
The anchor type, embedment depth, and edge distances must all match the engineering specification for your shed. Substituting a different anchor type or reducing embedment depth because of slab thickness constraints can affect the structure’s ability to meet its design wind loads.
In cyclonic areas (including parts of northern Queensland, Western Australia, and the Northern Territory), anchoring requirements are significantly higher. If your property is in a cyclonic wind region, confirm that both the shed and the anchoring system are engineered for those specific loads.
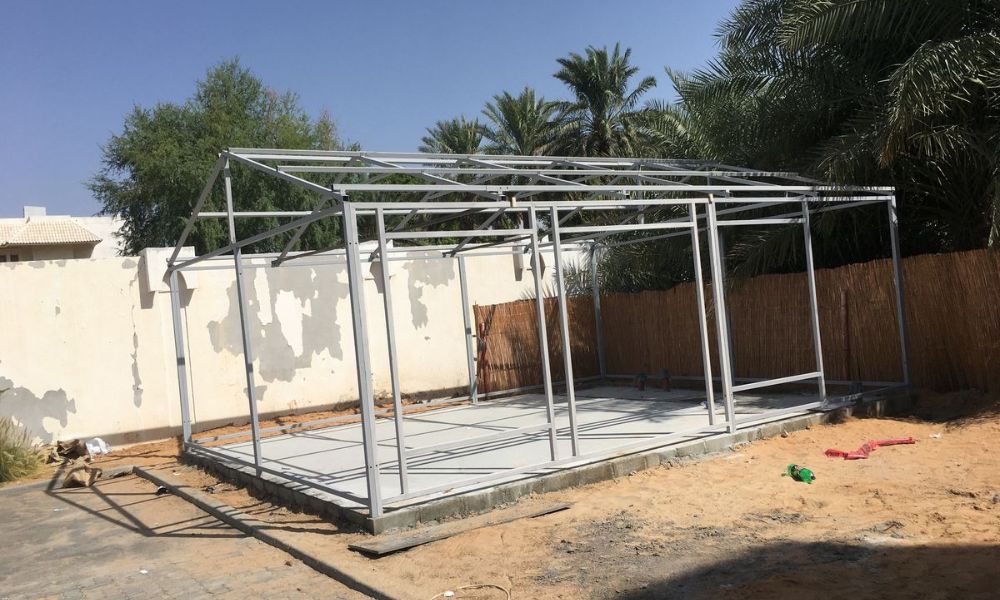
Shed Installation on Concrete — Common Mistakes to Avoid
These are the mistakes that most commonly affect the long-term performance of a concrete shed foundation. Each one is avoidable with adequate planning.
- Pouring the slab before confirming council approvals. In many Australian states and territories, a shed above a certain size requires a building permit before any work begins. Pouring the slab first and seeking approval later can result in the structure being required to be modified or removed.
- Using a generic slab specification regardless of site conditions. A 100mm residential slab is not appropriate for a farm shed storing heavy equipment. A slab designed for one site may be inadequate or over-engineered for another. Soil type, load, shed size, and wind region all affect what the slab should be.
- Skipping sub-base compaction. Uncompacted fill beneath the slab settles unevenly over time, causing the slab to crack and the shed frame to shift. This is not a problem that can be corrected cheaply after the fact.
- Omitting the vapour barrier. Ground moisture rising through a concrete slab will rust stored equipment, damage timber fittings, and accelerate corrosion of the shed frame at its base. A plastic vapour barrier is inexpensive relative to the damage it prevents.
- Poor site drainage. Water pooling around or under the slab undermines the sub-base over time and can cause significant slab movement in reactive soils. Grading must direct water away from the shed perimeter.
- Drilling anchors without checking for services. Striking an electrical conduit or drainage pipe when drilling anchor holes creates a safety hazard and a repair cost. Always check for underground services before drilling.
- Under-specifying anchors for the wind region. Anchors must be selected and installed according to the engineering specification for the site’s wind classification. Installing lighter anchors than specified — or fewer of them — reduces the structure’s ability to meet its design loads.
- Not allowing concrete to cure before loading. Concrete gains strength progressively. Installing the shed structure or placing heavy loads on a slab that has not reached adequate cure strength can damage the slab before it has reached its design capacity.
Does Your Shed Need Engineering or Council Approval?
In most Australian states and territories, a shed above a certain floor area will require a building permit and may require engineering certification. The threshold varies by state and by local council, but a common trigger point is 10 square metres. Sheds above that size — and particularly any shed with a concrete slab, enclosed walls, or connections to services — are likely to require approval.
The Australian Building Codes Board (ABCB) administers the National Construction Code (NCC), which establishes the minimum performance requirements for buildings and structures, including sheds. Local councils apply these requirements alongside their own planning rules, which govern setbacks, height limits, site coverage, and permitted uses.
The practical steps before installation are:
- Contact your local council to confirm the permit and approval requirements for your specific shed size and location.
- Check whether your shed supplier provides engineering certification as part of the supply package.
- If your property is in a cyclonic wind region, bushfire-prone area, or flood zone, identify those overlays before selecting your shed and slab design.
For more detail on NCC compliance and what it means for shed buyers in Australia, see our page on NCC compliance for sheds.
Why Site-Specific Shed Design Matters
A shed is not a single standardised product. The loads it must carry — wind, self-weight, imposed roof loads, and the forces transferred through the frame into the slab and anchors — vary with the site’s wind classification, terrain category, height, and the shed’s dimensions and configuration.
Professional Choice Sheds designs each structure for its specific site conditions, using Australian high-tensile steel supplied through BlueScope via Lysaght, and with engineering input from EDGE Consulting Engineers. The result is a shed that is designed to meet or exceed Australian Building Standards for its actual location — not a structure built to a minimum common denominator and sold the same way across every wind region and soil type.
This matters for the concrete slab too. When the shed engineering is site-specific, the anchor loads, base plate positions, and edge distance requirements are defined precisely. That information feeds directly into the slab design, so the concrete work is coordinated with the shed structure rather than guessed at after the fact.
If you are working through the planning or budgeting stage, our shed prices and options page provides indicative pricing across a range of sizes and configurations.
DIY or Professional Shed Installation — Which Is Better?
The right answer depends on the complexity of the project, the wind region, and what the shed will be used for.
DIY installation may be appropriate when:
- The shed is a smaller residential structure in a standard wind region (Wind Region A or B).
- The slab has been poured to a confirmed specification by a licensed concretor.
- The shed supplier provides clear, detailed installation instructions and engineering drawings.
- You have the tools, skills, and time to work safely at height and with structural steel.
Professional installation is worth considering when:
- The shed is large, complex, or involves multiple bays.
- The property is in a cyclonic, bushfire-prone, or flood-affected area.
- The slab is existing and its condition or specification is uncertain.
- The shed will carry significant loads — heavy machinery, mezzanine floors, or vehicle hoisting equipment.
- Council approval requires certified installation documentation.
DIY installation of the shed kit itself is separate from the concreting work. In most cases, a licensed concretor should pour and finish the slab regardless of whether you install the shed frame yourself. Errors in the slab are significantly harder to correct than errors in the shed frame assembly.
Shed Installation on Concrete — Final Checklist
Before installation begins, work through this checklist. It does not replace engineering or council advice, but it covers the practical conditions that most commonly affect shed installation outcomes.
- Confirm local council approval requirements and obtain any required permits before starting site work.
- Verify the shed’s engineering certificate matches your site’s wind region and terrain category.
- Assess soil type and confirm the slab design accounts for reactive or problematic soils if present.
- Grade the site so that surface water drains away from the shed footprint on all sides.
- Compact the sub-base to a consistent level before formwork is installed.
- Install a plastic vapour barrier over the compacted sub-base before pouring concrete.
- Confirm the slab specification — thickness, reinforcement grade, mesh spacing, and edge thickening — matches the shed’s load and size requirements.
- Allow the slab to reach adequate cure strength before installing the shed or applying any load.
- Check for underground services before drilling anchor holes.
- Install anchors at the positions, depth, and specifications defined in the engineering drawings.
- Torque anchor bolts to the values specified — do not estimate.
- Inspect the completed installation against the engineering drawings before use, and retain documentation for insurance and future reference.
Frequently Asked Questions About Shed Installation on Concrete
Can I put a shed on concrete?
Yes. A concrete slab is the most durable and widely recommended base for shed installation in Australia. The slab must be designed for the shed’s size, load, and site conditions. A standard slab suitable for light residential use may not be adequate for a workshop or farm shed storing heavy equipment.
What concrete slab do I need for a shed?
There is no single answer. A residential shed storing cars and garden equipment typically requires a 100mm reinforced slab with light mesh. A farm shed with heavy machinery may need 150–200mm of concrete with heavier reinforcement. The slab specification depends on shed size, intended loads, soil type, and wind region. Have the slab designed by a licensed concretor or engineer with access to the shed’s engineering documentation.
Can a shed go on an existing concrete slab?
Yes, in many cases — but the slab must be assessed first. Check its thickness, condition, level, and drainage characteristics. Confirm it extends to the full shed footprint and that there are no services beneath anchor positions. A slab in poor condition or one that is under-specified for the new shed’s loads may need modification or replacement.
Does a shed need to be anchored to concrete?
Yes. Anchoring a shed to its concrete slab is a structural requirement, not a recommendation. Wind uplift and racking forces can displace an unanchored shed. In Australian wind regions above Region A, and particularly in cyclonic areas, anchoring specifications are significantly more demanding. The anchor type, count, embedment depth, and placement must match the engineering specification for your shed.
Do I need council approval for a shed in Australia?
In most cases, yes — particularly for any shed above 10 square metres, any shed with a concrete slab, or any structure in a bushfire-prone, flood-affected, or cyclonic zone. Requirements vary by state and local council. Contact your council before starting any site work or ordering materials.
How do I stop water from getting under my shed slab?
Grade the surrounding ground so water flows away from the shed perimeter. Install the slab slightly above the surrounding ground level. Ensure guttering is fitted to the shed and downpipes direct water clear of the foundation. A plastic vapour barrier under the slab addresses moisture rising from the ground rather than surface water entry.
What should I check before installing a shed on concrete?
Confirm council approvals are in place, verify the slab specification matches the shed’s engineering requirements, check for underground services before drilling anchor holes, and confirm the slab has cured adequately before loading. Review the full checklist above before work begins.
Get Your Shed Foundation Right From the Start
Shed installation on concrete done well produces a structure that can last decades with minimal maintenance. Done poorly — with an under-specified slab, inadequate drainage, or anchors that do not match the engineering — it produces a structure that may fail under load, move in reactive soils, or be flagged during an insurance assessment.
The decisions that matter most happen before a single concrete truck arrives. Soil type, wind region, shed dimensions, intended use, and council requirements all feed into the slab design. Getting those variables confirmed early — and then coordinating the slab and shed engineering together — reduces the risk of expensive corrections later.
Professional Choice Sheds provides site-specific engineering for every structure it supplies, using 100% Australian high-tensile BlueScope steel and engineering developed in partnership with EDGE Consulting Engineers. If you are planning a new shed and want to understand the foundation requirements for your specific site, contact the Professional Choice Sheds team for a free quote and design consultation.